Sequences - Diatonic cycle of fifths
TAGS #Keyboard Topography #Transposition #’Cookie-cutter fingering”
Note: The materials below are taken from my class, Piano Improvisation and 20th Century Styles. There is different material based on the ‘chromatic’ cycle of perfect fifths at Cycle of Fifths
Title: "Diatonic Cycle of Fifths”
Improvisation Studio / Casey Sokol (4 pages of notation)
Rationale: These exercises can help pianists become more acutely aware of several things.
a/ A descending P5 results in the same tone (same tonal function) as if ascending by a P4. and vice versa.
b/ There will always be, between any two triads a fifth (or a fourth) apart, one common tone, and this common tone will “toggle” in function between being the root of a chord and then the fifth of the chord a fifth below.
c/ When moving to a triad whose root is a fifth away, there will be one common tone, and the two non-common tones will always do the same “dance,” shifting in parallel by one scale degree. The importance of this is that, in harmonic movement which adheres to good (or simple) voice-leading, there will always be simple gestures which represent that harmonic motion. So whatever theoretical representations one employs in regard to harmony, chord progressions always involve a kind of choreography of the hands and fingers which are, in essence, the way the body’s intelligence works with these materials.
d/ This choreography looks and feels a bit different depending on the triad inversions (see m.51) but the motion is just the same: only the location of the specific tone movements changes.
e/ By means of an octave shift of the middle note of a triad, the chord can be expressed in “open voicing,” – a very valuable asset for the improviser because of its more spacious resonance, its inherent tendency to be heard as three separate voices, its capacity to blend with a greater amount and diversity of additional material (melodic or harmonic).
Description: The first 74 measures of these sheets show some pertinent facts about the diatonic cycle of fifths. Even so, there are many things not made explicit here, such as the common knowledge that, when working within a major scale, the triads built from the 1st, 4th and 5th scale degrees will necessarily be major, those built from the 2nd, 3rd, and 6th degrees will always be minor triads, and the triad built on the 7th degree – lacking a perfect fifth – will always be a diminished triad (made of two conjunct minor thirds).
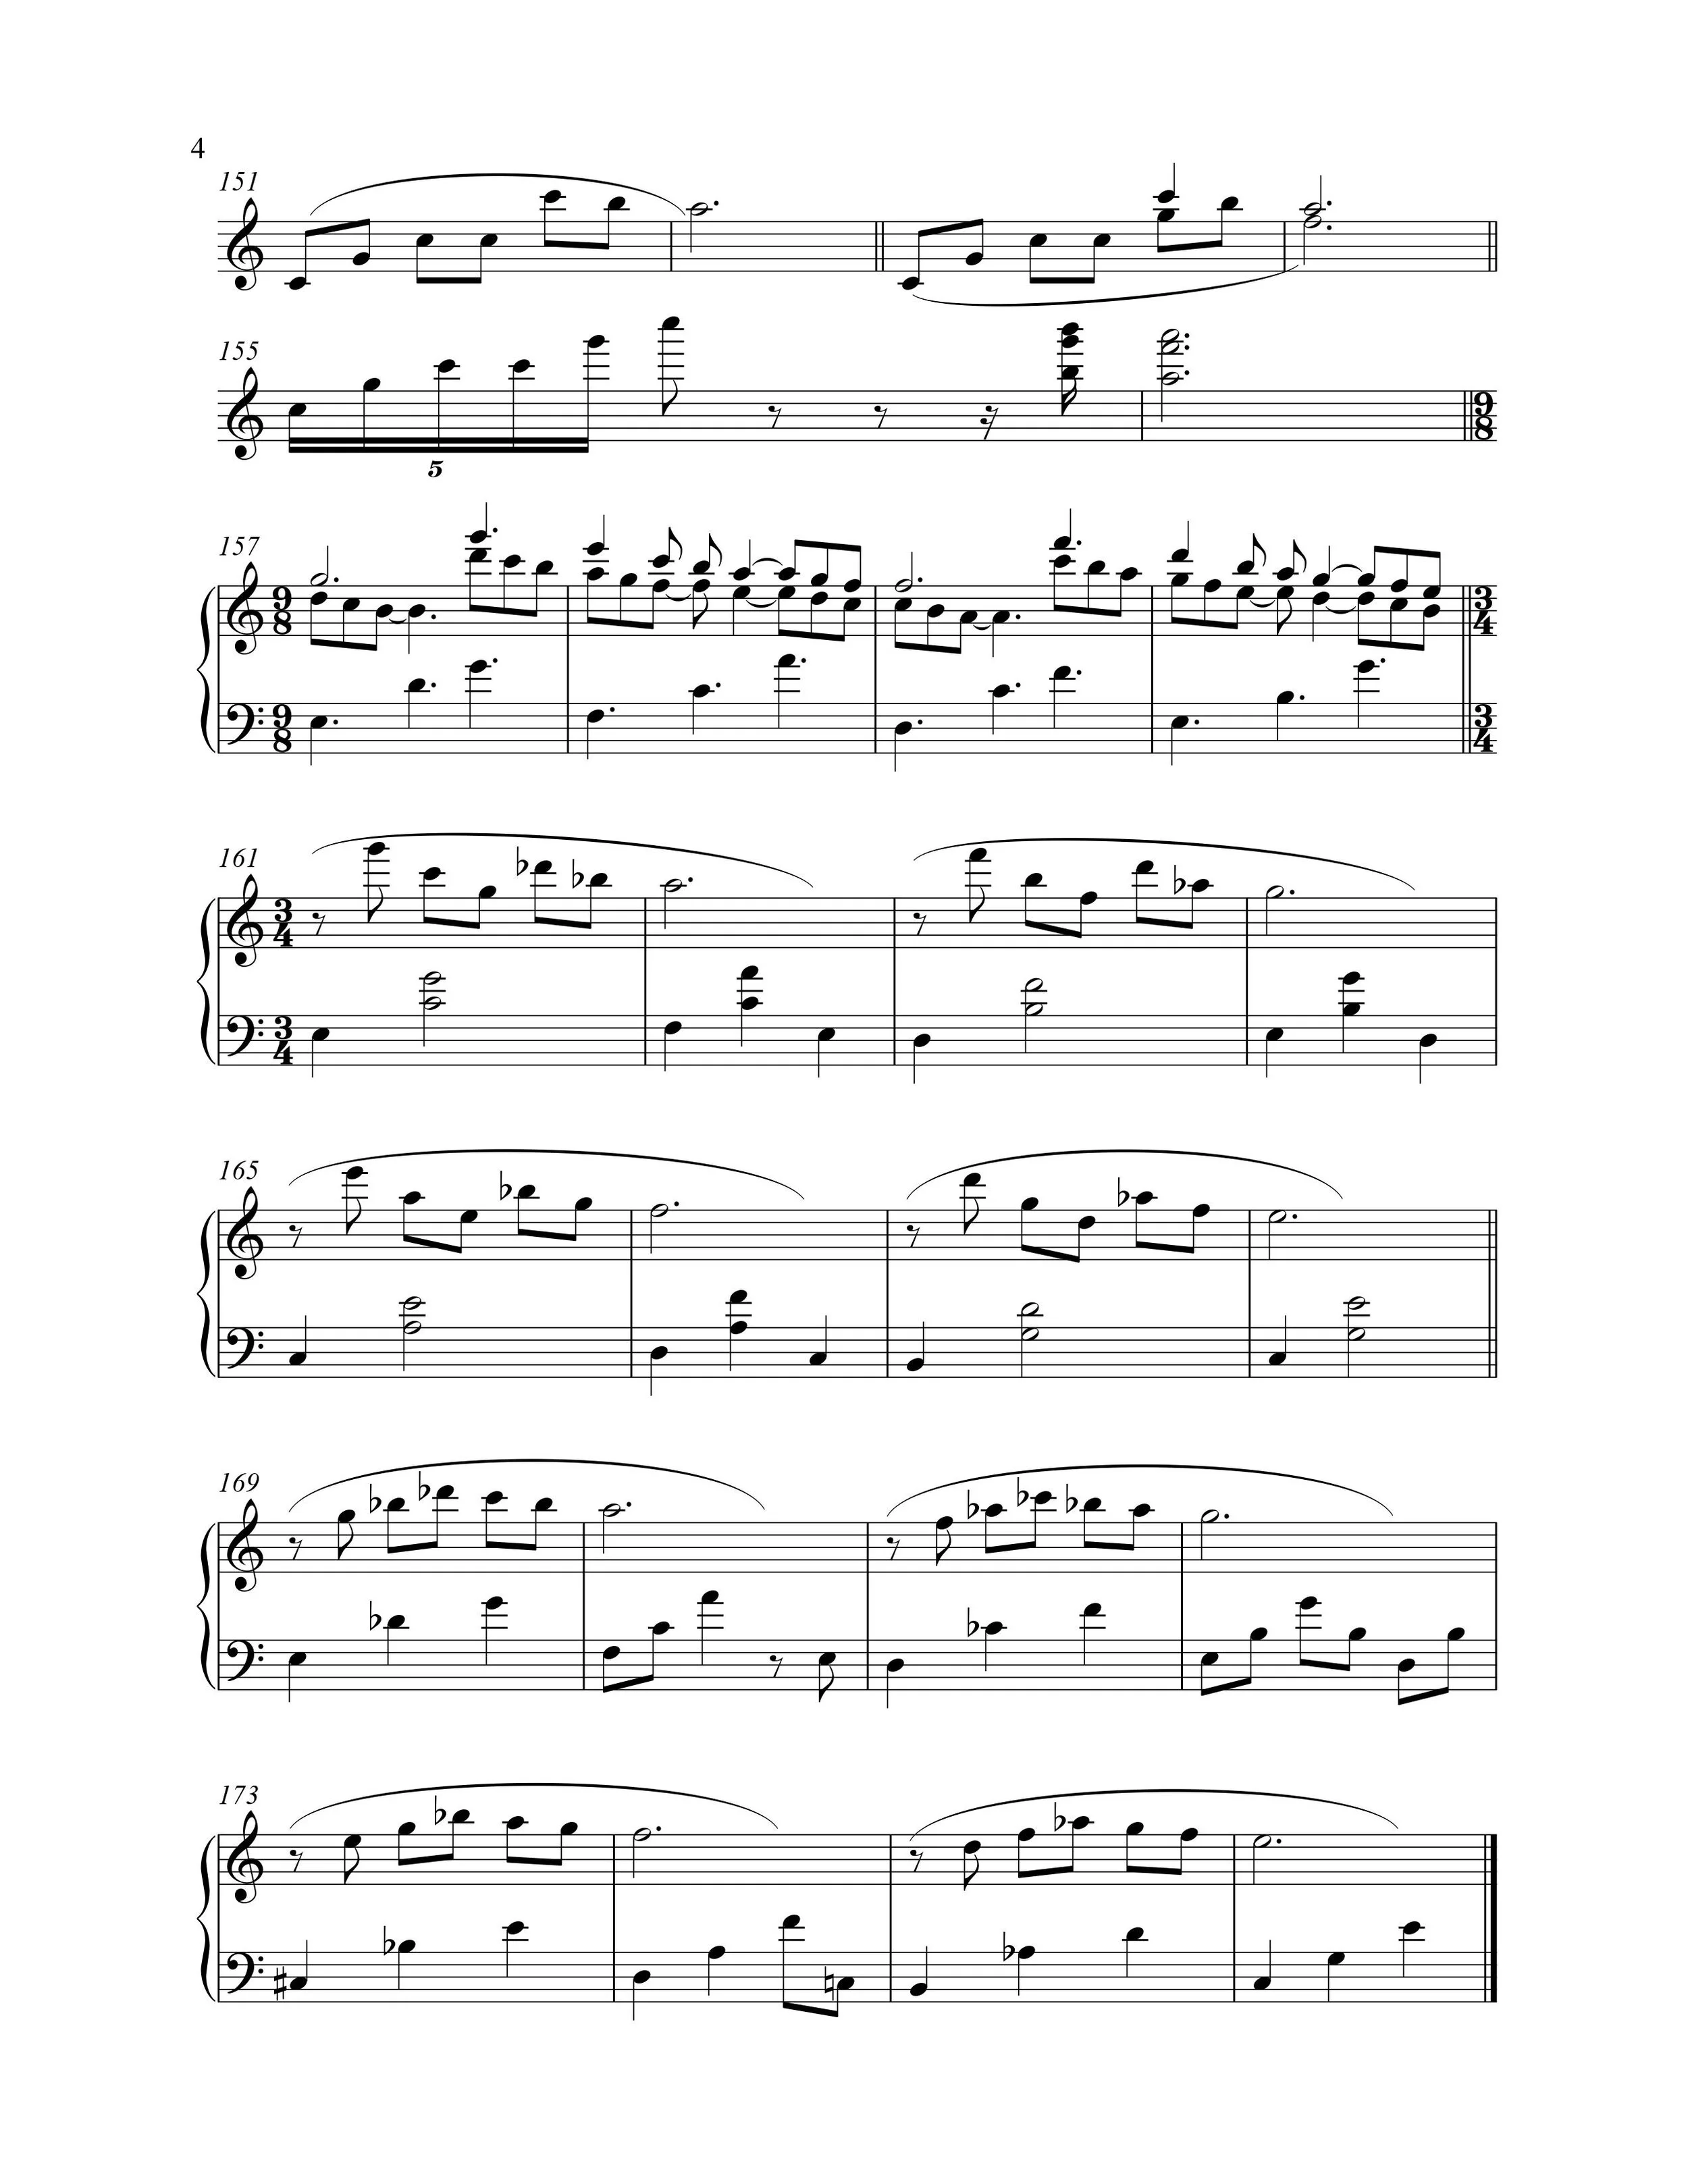
Then beginning at m. 75, where the L.H. first plays open voiced triadic inversions, there is a succession of motives which you are to sequence through the scale by descending degrees, that is to be used for diatonic sequencing. There are over 30 additional motives for practising with diatonic sequences. These exercises (and working with their transpositions) will be helpful in internalizing the topography of all the scales. These exercises all consist of two aspects: a single line melody in the R.H. accompanied in the L.H. by arpeggiated triads in open voicing. The broken triads of the 8-bar bass ostinato are guided by close voice leading, allowing the left hand to gradually acquire ease with chords voiced in large intervals. Although these exercises use triads which span the interval of a tenth, physical tension can be avoided by conceiving of the middle note of each triad as a physical pivot, stretching a fifth or sixth on either side of it, rather than keeping the hand stretched out and primed to span the tenth. In other words it is not advised to place the hand over the entire open-voiced chord and then arpeggiate it but to take it as two smaller intervals which the hand measures from the middle note. Beginning with m. 83, the whole octave of sequences is no longer notated. The new motif is sometimes presented alone and sometimes with one sequential displacement. Measure 109 introduces an implied two-voiced texture in the right hand and, in the motif at m.111, the two voices must be distinguished in performance. At m.157 the motif substitutes a seventh for the fifth in the left hand harmony. At m.161 the passing tones are introduced for the "lower" part, thus giving a heightened sense of three independent voices, and the partial blocking of the previously arpeggiated triad, creates some rhythmic and textural variety. The sequence at m.157 has an easy swing feel and the final two examples are distant echoes of the style of Schumann in their use of chromatic alterations to the harmony and melody.
Suggestions for Practice:
1. Play as written and in a steady tempo. Do not play faster than you can keep a really steady tempo. Try not to feel discouraged at how slow you probably need to play but rather see the genuine enjoyment you get from being able to follow your precise, intentional movement. Most of your musical life will be spent in practice, not performing. If you cannot find a love of practice, you’re musical life will be in jeopardy. Practice is tremendous fun and very interesting. Having a practice (as opposed to just practicing) is a rare opportunity for deep engagement. Don’t miss it. Visualize the physical layout of each hand position before playing the sequence on each degree. Use the exact same fingers for each displacement of the hand. While this will result in some awkward technique, it will allow the gesture (the “choreography”) to become the dominant sensation, and in this way you can establish increasingly meaningful associations between the physical and musical gesture. Play with as much attention as possible on the performance quality, that is, always begin by listening (even starting before the first note you play). Remember also that you can (and should try each day) to practice these exercises away from the piano, with your hands and fingers (and whole body) as relaxed as possible—even with your eyes closed and without playing “air-piano.”
2. Excluding the final three sequences, gradually transpose all the material into all twelve keys, taking one or, at most, two new ones each day. Remember to look at the keyboard rather than your fingers, trying to see the topography of the whole scale, including the notes you’ve just left and those you’ve not yet reached. Also remember that the difference between keys with one more or one less accidental will only be one note. The other six will be the same. Don’t get caught needlessly conceiving of each new key as starting and ending on “do,” but see the key as a “pitch set.” The pitch set can “rotate”, with any of its members serving as tonic for different modes. In working with a succession of different keys then, the best order may be to work gradually through the sharp keys or the flat keys, moving deeper into the flat or sharp keys by one new accidental each time.
3. Compose several motifs using the given goal tones used in this exercise.
4. Compose several variations based on other goal tone combinations.


TAGS: #Modal playing #Sequencing #Diatonic
Diatonic Sequences
Rationale for transposing the exercises:
All of the sequence-based exercises on this site are intended for a few common reasons. Instrumentalists should spend some consistent time transposing simple phrases to all the keys. The improvising musician needs to feel like s/he is on more or less friendly turf in whatever key area arises during your playing. Whether you find yourself in a new key by accident or by prepared or unprepared modulation, it’s important not to feel disoriented and lacking in confidence.
By transposing these phrases to all the keys (and without notation to support you), you are encouraged to internalize the “shape” of each of these key areas, that is, its “terrain,” or the “topography” of its black-and-white keys. Your eyes and body must really know this terrain without having to think about key structure. It gradually becomes a
body-based knowledge. Just as you can reach into your pocket or bag and, without looking distinguish between your keys and your wallet, your eyes and fingers develop a very intimate sensory knowledge of each scale. Once you become very familiar with the landscape of a key, you have better access to the six displacements of that scale, thus better access to modal playing.
Rationale for practicing sequential playing through all seven scale degrees:
By learning the key areas as topographical shapes—as landscapes—playing in any mode should become almost effortless. Instead of having to learn six new modes for each key, there will only be twelve topographical terrains, each of which can be named or expressed as seven different modes.
There are also a number of scale forms besides the major scale, and they can each be practiced by means of this same process of shifting the gesture or phrase to the next scale degree.
Tips:
Open voicings:
It’s important to realize that these large open-voiced chords in the left hand are “de rigeur” for pianists. They are an essential part of the sound of many composers from the last few hundred years and have always been a fundamental tool of the piano improviser in almost every style from stride and ragtime to all kinds of contemporary stylings.
Hand position:
For those of us with relatively small hands, it’s important to learn to use the middle note of open voiced chords as a kind of pivot around and from which the outer notes are measured. This way you can feel, in this exercise, that you are stretching only a sixth or fifth under or above that middle key. Since you do not have to strike the full interval of a tenth, you never have to actually stretch that far. It is tiring, it can result in inaccuracies, and it prolonged stretching can cause tendonitis. You really don’t even have to perceive the outside interval of the tenth as the visual guide. The middle note (the common tone) can serve as an actual physical pivot (either by keeping a finger touching that key or hovering nearby or above it). Relying on the stability of that common tone will reduce anxiety about hitting the correct keys and it will reduce the likelihood of strain.
Sequential fingering:
When beginning to work with each new gesture or each new key, it is very helpful to use sequential fingering. You can think of it as “cookie-cutter” fingering, where every iteration of the phrase or gesture is played with the same fingering. When using sequential fingering for sequential passages, you will, at some point, find yourself putting a thumb on a black note. The idea here is not to encourage poor fingering but, just for the beginning anyway, to begin to really start to associate physical gesture with musical gesture. The hand begins to acquire some confidence that this movement-shape will equal, or will result in, this particular musical-shape. This trains the motor brain in a way which allows the intelligence of movement to participate directly in musical creation without always having to resort to thinking, which is awfully slow for musical creative flow.
Musical quality of practice:
I cannot stress enough that you should not allow yourself to practice mechanistically. While you should not try to impose inappropriate levels of expression on simple exercises, you should still always try to play well: in a steady tempo, with some attention to control of pedaling, dynamics, articulation, phrasing, and so on. That is, you should really make an effort to listen as you practice (not nearly as easy as you may think) and be aware of all the nuances taking place. Don’t let the touch become stiff and loud, but neither should you play with an unchanging, lovely tone. Keep it alive artistically without mannerisms, excesses, or artificiality. Find the simple beauty in the exercise and play it as you might play in order to inspire your student.
Experiment playing in different ways, perhaps substituting dotted or triplet figures for straight duple figures, playing in different octaves when the tone becomes too thin or too heavy, and so on. When playing in slow tempos, don’t drag the time because you’re really wanting to play fast but cannot yet do it. When you play slowly, “perform” slowly. Conceive of the performance tempo as quite slow, so you can be “behind” it or “inside” it. If you play largo then play, for example, with a noble sentiment, or try to support this slow tempo with a corresponding motivation such as intense curiosity, meditation, or a sense of mystery. If you just resentfully play slowly it will neither be fun nor helpful to your learning. If you play too fast and begin hesitating and “stuttering,” and if you encounter many occasions where you have to stop and rebegin, it will be damaging to your confidence and it will diminish the possibility for the future transfer of this knowledge to real improvised situations.